Showing posts with label Desserts. Show all posts

Tuesday, 12 November 2013

Bread pudding

Bread pudding is one of my favorite comfort desserts! I have been craving it for a while now, so I finally got down to making it =)
Here's the recipe (really easy) to make a 8-inch square pan of moist bread pudding!

Ingredients

  1. 6 slices of bread (stale bread preferred)
  2. 1/2 cup raisins
  3. 4 eggs, beaten
  4. 2 cups of milk
  5. 2 tablespoons of melted butter
  6. 3/4 cup of sugar (I like to do a mix of white and brown sugar)
  7. 1 tablespoon of vanilla extract
  8. 3/4 tablespoon of ground cinnamon
  9. 1/4 tablespoon of nutmeg
Instructions
  1. Heat up the oven to 350 F, or 175  C.
  2. Cut the crusts off the bread, and tear the bread into big chunks.
  3. Lay the bread and crusts loosely in the pan. (See first photo; I also line my pan with parchment paper to minimize the amount of washing I have to do afterward)
  4. Sprinkle raisins amidst the bread.
  5. Combine all the remaining ingredients in a bowl, and mix well.
  6. Pour the egg mixture onto the bread. 
  7. Make sure that the bread soaks up the egg mixture, using a fork to press lightly on the bread. (see second photo)
  8. Put the pudding into the oven, and let it bake for 45 minutes, or until the top springs back when lightly tapped. (see third photo)

Ready to eat! Enjoy! 
Placing bread and raisins loosely in a parchment-lined pan

After adding the egg mixture

Done and ready to eat!
Enjoy!


Saturday, 27 April 2013

Sushi Sam's Edomata (San Mateo)

At least two friends recommended this Japanese sushi restaurant to us, so we decided to make the drive up to San Mateo. It was worth it.
We ordered salmon nigiri (our standard for testing sushi bars), soft shell crab roll, and omakase sashimi (our friend recommended we try it). Everything was provided at very generous cuts, and the salmon had lots of fat (close to salmon belly). We quite liked the soft shell crab roll although we found that the batter was a bit too thick and we couldn't really taste much of the meat. 
What I really wanted to talk about was the omakase. It was completely worth the $40 we paid for it. 8 big cuts of a variety of white fish, special yellowtail, flounder, TORO, and a seasonal baby squid marinated with miso. The toro simply melted in our mouth, no need for chewing! We hadn't had the other kinds of fish before, and it was a good first experience. 
Finally, the omakase dessert, white miso parfait, was simply delicious. The blend of flavors in the cream and spongecake was heightened by the slightly salty taste of the miso puree. 
We would come here again!

Salmon nigiri and soft shell crab roll. Check out the thick layers of fat on the salmon

Omakase sashimi

White miso parfait. YUM!

Sushi Sam's Edomata
218 E 3rd Ave
San Mateo, CA 94401
(650) 344-0888


Sunday, 31 March 2013

Chocolate Chip Cookies

This is my favorite recipe for making dark chocolate chip cookies that are soft on the inside, yet crispy on the outside.

The whole recipe takes less than 1 hour from start to finish, and made ~60 mini bite-sized cookies:


Ingredients:

  1. 2+1/4 cups all-purpose flour
  2. 1/2 teaspoon salt
  3. 1 teaspoon baking soda
  4. 1/3 cup cocoa powder (*** Omit this if you don't want double chocolate cookies***) 
  5. 3/4 cup granulated sugar
  6. 1 teaspoon vanilla extract
  7. 1 cup (= 2 sticks) butter, softened
  8. 3/4 cup packed light brown sugar
  9. 2 eggs
  10. 2 cups semi-dark chocolate chips (I like using Guittard's or Ghiradelli)

Instructions:
  1. Preheat oven to 375 F.
  2. Stir together the flour, cocoa powder, salt and baking soda.
  3. Beat together the butter, granulated sugar, brown sugar and vanilla extract until creamy.
  4. Add eggs to the liquid mixture, and beat well.
  5. Gradually add the flour mixture, and mix well. (The dough will become rather stiff)
  6. Stir in the chocolate chips until evenly mixed.
  7. Drop by rounded teaspoon-fuls onto an ungreased cookie sheet. (Or use your hand to pinch off and round off a small chunk)
  8. Bake the cookies for 8-10 minutes, or until lightly browned, or the top has hardened and cracked.
  9. Remove from oven and allow to cool.
Enjoy! The cookies will look like little round mochi balls.


Sunday, 13 January 2013

Madeleines

Fran came over for the weekend and we made madeleines!

Here's the recipe (really easy!):

Ingredients:
  1. 2 eggs at room temperature
  2. 1/4 cup butter, melted and cooled to room temperature 
  3. 1/2 cup all-purpose flour 
  4. 1/3 cup granulated sugar
  5. 3/4 teaspoon vanilla extract
  6. A pinch of salt
  7. 1 tablespoon lemon zest
Instructions:
  1. Preheat oven to 375 degrees F. Butter and flour 12 (3 inch) madeleine molds; set aside.
  2. In a small mixing bowl, beat eggs, vanilla and salt at high speed until light.
  3. Beating constantly, gradually add sugar; and continue beating at high speed until mixture is thick and pale and ribbons form in bowl when beaters are lifted, 5 to 10 minutes.
  4. Sift flour into egg mixture 1/3 at a time, gently folding after each addition.
  5. Add lemon zest and pour melted butter around edge of batter. Quickly but gently fold butter into batter. Spoon batter into molds; it will mound slightly above tops.
  6. Bake 14 to 17 minutes, or until cakes are golden and the tops spring back when gently pressed with your fingertip.

Monday, 7 January 2013

Friday, 28 December 2012

Salted Caramel mini Chocolate cupcakes

Was bored during this holiday season and didn't feel like doing any work, so I decided to bake!
Today's experiment is salted caramel mini chocolate cupcakes. These are mini chocolate cupcakes with a salted caramel filling, topped with dark chocolate salted caramel frosting.
The result turned out to be really yummy! =)

I adapted the recipe from here.

Using a mini muffin tray, I made 48 mini cupcakes with enough batter leftover for 4 madeleines. 
Alternatively this recipe yields 21 regular cupcakes.

Ingredients:

For the cupcakes:

  1. 1 1/2 cups all-purpose flour
  2. 3/4 cup unsweetened Dutch-process cocoa powder (I used Ghiradelli cocoa powder)
  3. 1 1/2 cups granulated sugar
  4. 1 1/2 teaspoons baking soda
  5. 3/4 teaspoon baking powder
  6. 3/4 teaspoon salt
  7. 2 large eggs
  8. 3/4 cup buttermilk (I made this by adding 1 tablespoon distilled white vinegar to 1 cup milk)
  9. 3 tablespoons vegetable oil
  10. 1 teaspoon pure vanilla extract
  11. 3/4 cup warm water
For the salted caramel filling:
  1. 2 1/2 cups sugar
  2. 2/3 cup water
  3. 3/4 cup heavy whipping cream
  4. 2 1/2 teaspoons flaked sea salt, preferably Fleur de Sel
For the dark chocolate salted caramel frosting: (almost similar to before, with a caramel twist)

  1. 1/8 cup  unsweetened Dutch-process cocoa powder 
  2. 1/8 cup boiling water
  3. 3/4 cups / 1.5 sticks unsalted butter at room temperature
  4. 1/4 cup confectioners’/icing/powdered sugar, sifted
  5. pinch of salt
  6. 227 grams good-quality semi-sweet chocolate, melted and cooled (I used Guittard semi-sweet chocolate chips, found in Whole Foods)
  7. A sufficient amount of the salted caramel, from above, to your liking
Instructions:

Making the cupcakes:
  1. Preheat the oven to 350 F. 
  2. Line mini muffin tray with paper liners. 
  3. Mix together flour, cocoa, sugar, baking soda, baking powder, and salt. 
  4. In another bowl, mix together eggs, buttermilk, oil, extract, and the water.
  5. Add the wet ingredients to the dry ingredients. Fold in and mix until smooth and combined. Do not over-mix, to avoid a dense cake.
  6. Spoon the batter into liners about two-thirds full. 
  7. Bake approximately 10-12 minutes, or until tester comes out clean.  (If you're making normal-sized cupcakes, baking time will be 13-15 minutes)
  8. Transfer tins to wire racks and allow to cool for 10 minutes; turn cupcakes onto racks and let cool completely. (Cupcakes can be stored overnight at room temperature, or frozen up to 1 month in air tight containers.)
  9. Make the salted caramel. While waiting for the caramel to form, use a paring knife to cut a cone-shaped piece (about half-way deep into the cupcake) from the center of each cupcake and throw away the narrower tip part. Keep the wider top part of the cone as a breadbowl-like cover over the caramel filling (see photos below for example).
Hollowed out cupcakes. The small pieces at the sides are the remaining top "breadbowl" covers


Sticking the breadbowl covers onto their respective cupcakes


Making the salted caramel filling:

  1. Heat sugar with the water in a heavy saucepan over medium-high, stirring occasionally, until syrup is clear; clip a candy thermometer to side of pan and stop stirring.
  2. Cook until syrup comes to a boil, washing down sides of pan with a wet pastry brush as needed. 
  3. Boil, gently swirling pan occasionally, until mixture is caramelized and just reaches 360°F. 
  4. Remove from heat and slowly pour in cream; stir with a wooden spoon until smooth. Be careful! Adding cream can cause the whole mixture to bubble!
  5. Stir in sea salt.
  6. Let cool for about 15 minutes; if caramel begins to harden reheat gently until pourable. 
  7. Spoon 1 to 2 teaspoons warm caramel into each hollowed-out cupcake. The caramel will slightly sink into the cupcake – just add a bit more. Sprinkle a pinch of sea salt over filling.
  8. Cover the filling with the breadbowl-like cake cover from before.
  9. Use the leftover caramel for the frosting.
Caramel filling inside the cupcake

Making the dark chocolate salted caramel frosting:
  1. Combine cocoa powder and the boiling water in a small bowl or glass measuring cup, and stir until it cocoa has dissolved. 
  2. Beat the butter, the icing sugar, and salt on medium-high speed until it is pale and fluffy–about 5 minutes. 
  3. Reduce mixer speed to low, and add melted chocolate (cooled! If not the butter will melt), beating until combined and scraping down the sides of the bowl as needed. 
  4. Beat in the cocoa mixture until well incorporated. 

Final step:

Pour the frosting into a piping bag (I used a ziploc bag and cut a small hole in the corner), and decorate the cupcakes!


Afterthoughts:

This recipe was really easy to follow, with a minimal number of steps. 

On an non-baking related note, life can be quite funny/coincidental sometimes. I was at Boudin Bakery in San Francisco on Saturday to try their clam chowder breadbowl and watched the staff make the breadbowls. That very observation helped me make my hollowed-out cupcakes today, all I had to do was recall what I saw over the weekend, and repeat on a smaller scale!
Also, as I was baking, the whole ritual of following instructions and measuring out precise quantities felt very similar to doing experiments in the lab. In fact, I was reminded of one of my first research internships, when the professor asked me if I cooked, since doing experiments was just like cooking. Very true. I wonder if my general ease with experiments has been aided by my intuition in the kitchen, or even vice versa. Either way, I'm glad to be good at both, if not I wouldn't know what to do with my hands half the time :)


Finally, a candid photo of me filling cupcakes!


Saturday, 1 December 2012

Salted caramel chocolate fudge "Giant" cake


I had the inspiration to bake another cake today, so I decided to try this recipe!


Before writing about the ingredients/instructions, I must say that I am always horrified by the amount of sugar and butter that goes into cake and icing. Making the pastry myself only makes me feel slightly better since I can control how much 'junk' goes into it @_@

Anyway, I'm calling this a giant cake because we didn't expect it to be so big.. (although the recipe did call for three layers). I only made 2 layers of cake because I got lazy, so please note the change in the buttercream proportions!

The instructions are a little long, but here goes:


Ingredients (for a three-layered cake)


Dark chocolate cake layers:


  1. 2 3/4 cups all-purpose flour
  2. 2 2/3 cups sugar (I used 1 cup white sugar + 1 cup brown sugar in mine)
  3. 2 3/4 teaspoon baking soda
  4. 2 3/4 teaspoon baking powder
  5. 1 cup unsweetened Dutch-process cocoa powder (I used Hershey's)
  6. 1 3/4 teaspoons salt
  7. 0.6 cups vegetable oil 
  8. 1 cup buttermilk (I made mine with fresh milk plus 1 tablespoon distilled white vinegar)
  9. 4 eggs
  10. 1 cup hot coffee 
  11. 2 tablespoons of vanilla
Salted caramel Swiss meringue buttercream: (makes 2 layers of buttercream. During baking, I reduced everything to make only 60% of the original volume)
  1. 1.35 cup castor sugar - separated into 0.85 cup and 1/2 cup portions
  2. 1/4 cup water
  3. 1/4 cup heavy cream at room temperature
  4. generous pinch of sea salt (for the caramel, and additional sea salt, preferably Fleur de Sel, for sprinkling)
  5. 5 large egg whites
  6. pinch of salt (for meringue)
  7. 2 tablespoons pure vanilla extract
  8. 1.3 cups unsalted butter
Dark chocolate fudge frosting:
  1. 1/4 cup + 2 tablespoons unsweetened Dutch-process cocoa powder (I used Hershey's)
  2. 1/4 cup + 2 tablespoons boiling water
  3. 1 1/2 cups/3 sticks unsalted butter at room temperature
  4. 1/2 cup confectioners’/icing/powdered sugar, sifted
  5. pinch of salt
  6. 454 grams good-quality semi-sweet chocolate, melted and cooled (I used Ghiradelli semi-sweet chocolate chips)
Instructions:

For the cake layers
  1. Preheat oven to 350°F
  2. Grease and line 3 8-inch cake tins, dust with cocoa powder, tapping out the excess. 
  3. In a large bowl, sift in all the dry ingredients. 
  4. Add all the remaining ingredients to the bowl with the dry ingredients and mix well with a heavy hand whisk for about 2 minutes. 
  5. Pour into prepared tins (batter will be quite liquid). Tap the tins on the counter a few times. 
  6. Bake each layer for about 20-25 minutes, rotating once (if necessary). 
  7. The cake is done when toothpick or skewer comes out barely clean. Refrain from overbaking. Cool completely on a wire rack in the pan.

Preparing the salted caramel Swiss meringue buttercream

Prepare the salted caramel first. 
  1. Place 130 grams/5 ounces/1/2 cup + 2 tablespoons of the castor sugar and the water in a medium saucepan to a boil over medium heat. 
  2. Stop stirring and cook until caramel is dark amber, gently swirling from time to time. 
  3. Remove from heat, and gradually add the cream, whisking by hand until smooth. It will be splatter slightly (less if cream is room temperature). 
  4. Whisk in sea salt and vanilla. Let cool and start the buttercream immediately.
To make the buttercream
  1. Combine the egg whites, sugar and salt in a heatproof bowl over a pan of simmering water. 
  2. Whisk frequently, keeping it over the heat, until the mixture reaches about 160°F and the sugar has dissolved. 
  3. Transfer the mixture to a mixer with a whisk attached and beat on medium-high for 8 minutes, until stiff peaks have formed and the mixture has cooled to room temperature. 
  4. Turn down the speed to medium and start adding small chunks of butter, checking that it has incorporated before adding more.
  5. Keep beating until it comes together.  
  6. With the mixer running on low, drizzle in the salted caramel sauce gradually, beating until well combined between each addition. 

Preparing the dark chocolate fudge frosting
  1. Combine cocoa powder and the boiling water in a small bowl or glass measuring cup, and stir until it cocoa has dissolved. 
  2. Beat the butter, the icing sugar, and salt on medium-high speed until it is pale and fluffy–about 5 minutes. 
  3. Reduce mixer speed to low, and add melted chocolate (cooled), beating until combined and scraping down the sides of the bowl as needed. 
  4. Beat in the cocoa mixture until well incorporated. 

Assembling the cake
  1. Dollop a small bit of buttercream onto your intended serving plate/cake board. 
  2. Place one cake layer on and layer on about 3/4 cup of the salted caramel buttercream. 
  3. Repeat with the second layer of cake. 
  4. Place the last layer of cake on top and coat the entire cake with a crumb coat using the chocolate fudge frosting. 
  5. Refrigerate cake for 15-20 minutes. 
  6. Once the crumb coat is set, remove cake and cover with the remaining fudge frosting. 
  7. Return cake to the fridge and let it set, about 15-20 minutes. Sprinkle with fleur de sel or flaked sea salt to decorate.
Photo-time!

Here's how my cake batter looked like:

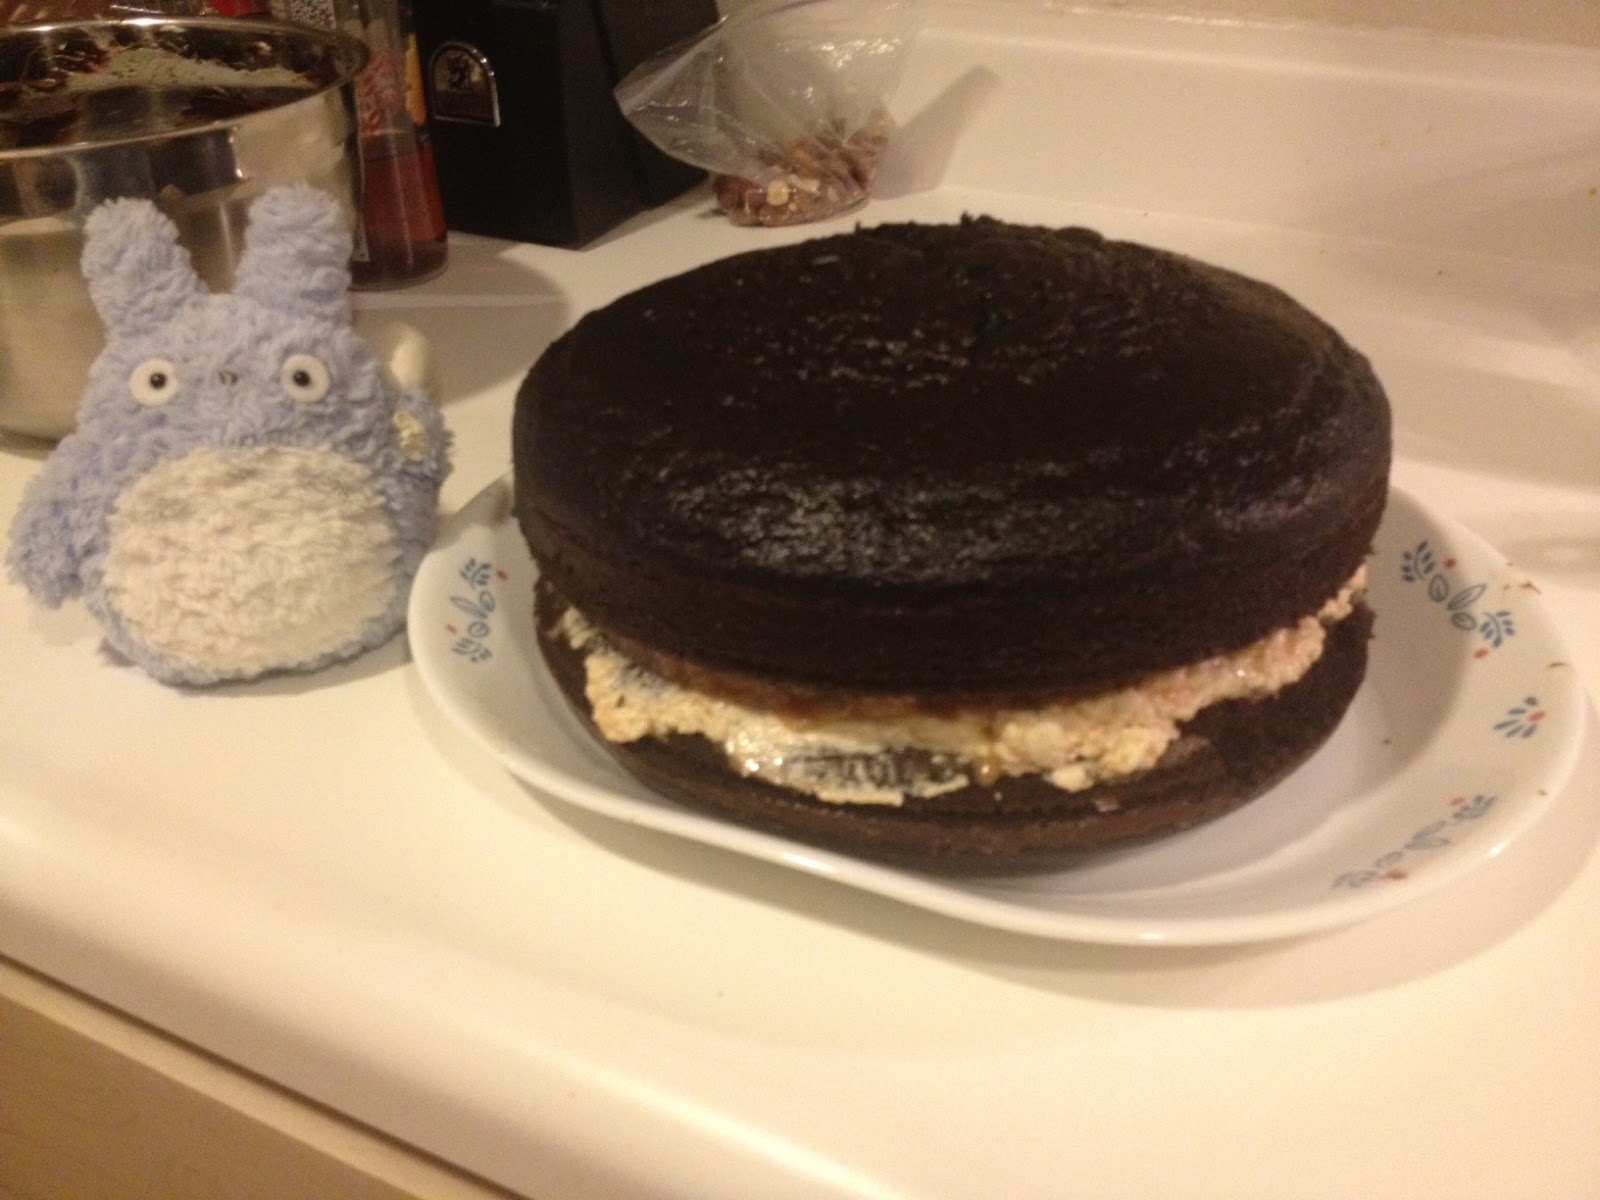
After combining both cake layers with a layer of salted caramel buttercream:

 It looks like a GIANT MACAROON. I flipped the bottom layer so that the flat part was contacting the buttercream
 Here you can see how much my top layer rose.
 After frosting with fudge!

It looks better after setting!
Taste test: the cake tasted a little too strongly of baking soda, so maybe next time I'll add slightly less of that. In general everything tasted nice, but the cake layer might have been a bit thick, though moist, relative to the buttercream (probably why the original recipe asked for 3 layers). 

Monday, 20 August 2012

Paris Baguette

I can't believe that I haven't written a post about Paris Baguette yet. This is one of my favorite bakeries in the Bay Area so far, which offers a wide selection of Japanese-bakery-style pastries. Every pastry I've tried so far has been delicious -- high toast, green tea pastry, red bean pastry, sweet rice pastry (my ultimate favorite! This has azuki inside mochi inside pastry), tuna melt sandwich, strawberry shortcake (my all-time favorite cake), green tea pumpkin shortcake, etc.

I should post photos of the pastries next time before I eat them too quickly... 

Anyway, we heard that Paris Baguette in Palo Alto started selling shaved ice, so we went to try it yesterday. It was rather... disappointing =/ My boyfriend described the experience quite aptly -- "This is what you get when a bakery tries to sell shaved ice." Indeed. 

From the first look, it really looked promising. Lots of fruit, azuki on top, even mochi bits. Yummy, right? 


WRONG. Look at what's wrong in this picture. THE ICE IS WRONG. This is not the shaved ice I was expecting. I was hoping for shaved ice like the one you get from Taiwanese places, where you literally SHAVE snowflakes off the ice, not grind it up like ice-kacang or lame american snowballs =(
Or maybe I'm just pampered....
Ice aside, the strawberry sauce they poured over the ice was a little weird =/ And the melon didn't go well with the strawberry and kiwi, because the melon taste overwhelms the light kiwi taste! 
There was a huge lump of vanilla ice-cream in the middle of the whole ice tower, which was a surprise. Pleasant for some, not so much for us I guess, because it made the whole thing taste pretty random, as if they couldn't decide which style to make it in...
Or maybe we were just affected by our disappointment with the ice =(


Back to eating pastries for us..
*There is another branch of this bakery in Sunnyvale. The Palo Alto branch is newer and bigger. This is also a Korean bakery that makes Japanese-style pastries, just putting it out there. 

Paris Baguette (Palo Alto)

383 University Ave
Palo Alto, CA 94301
(650) 838-0404

Thursday, 26 July 2012

Golden Island Cafe (San Francisco)


We were in the area for a haircut and decided to try this place while passing by. 
Yelp reviewers said that the fruit here is fresh and the mango sago is especially popular. Indeed it lived up to the reviews. We are fans of sago, and this didn't disappoint! I also had the steamed/curdled milk with ginger, which was nice too. It was a little soft, but that was ok! Not too expensive for dessert, at $4 for each item. The menu looked pretty authentic to Hong Kong cafe cuisine, so we will probably try the food next time!


1300 Noriega St
(between 20th Ave & 21st Ave) 
San Francisco, CA 94122
Neighborhood: Outer Sunset

(415) 759-9118

Sunday, 15 July 2012

Lappert's Ice cream shop (Pacific Grove)

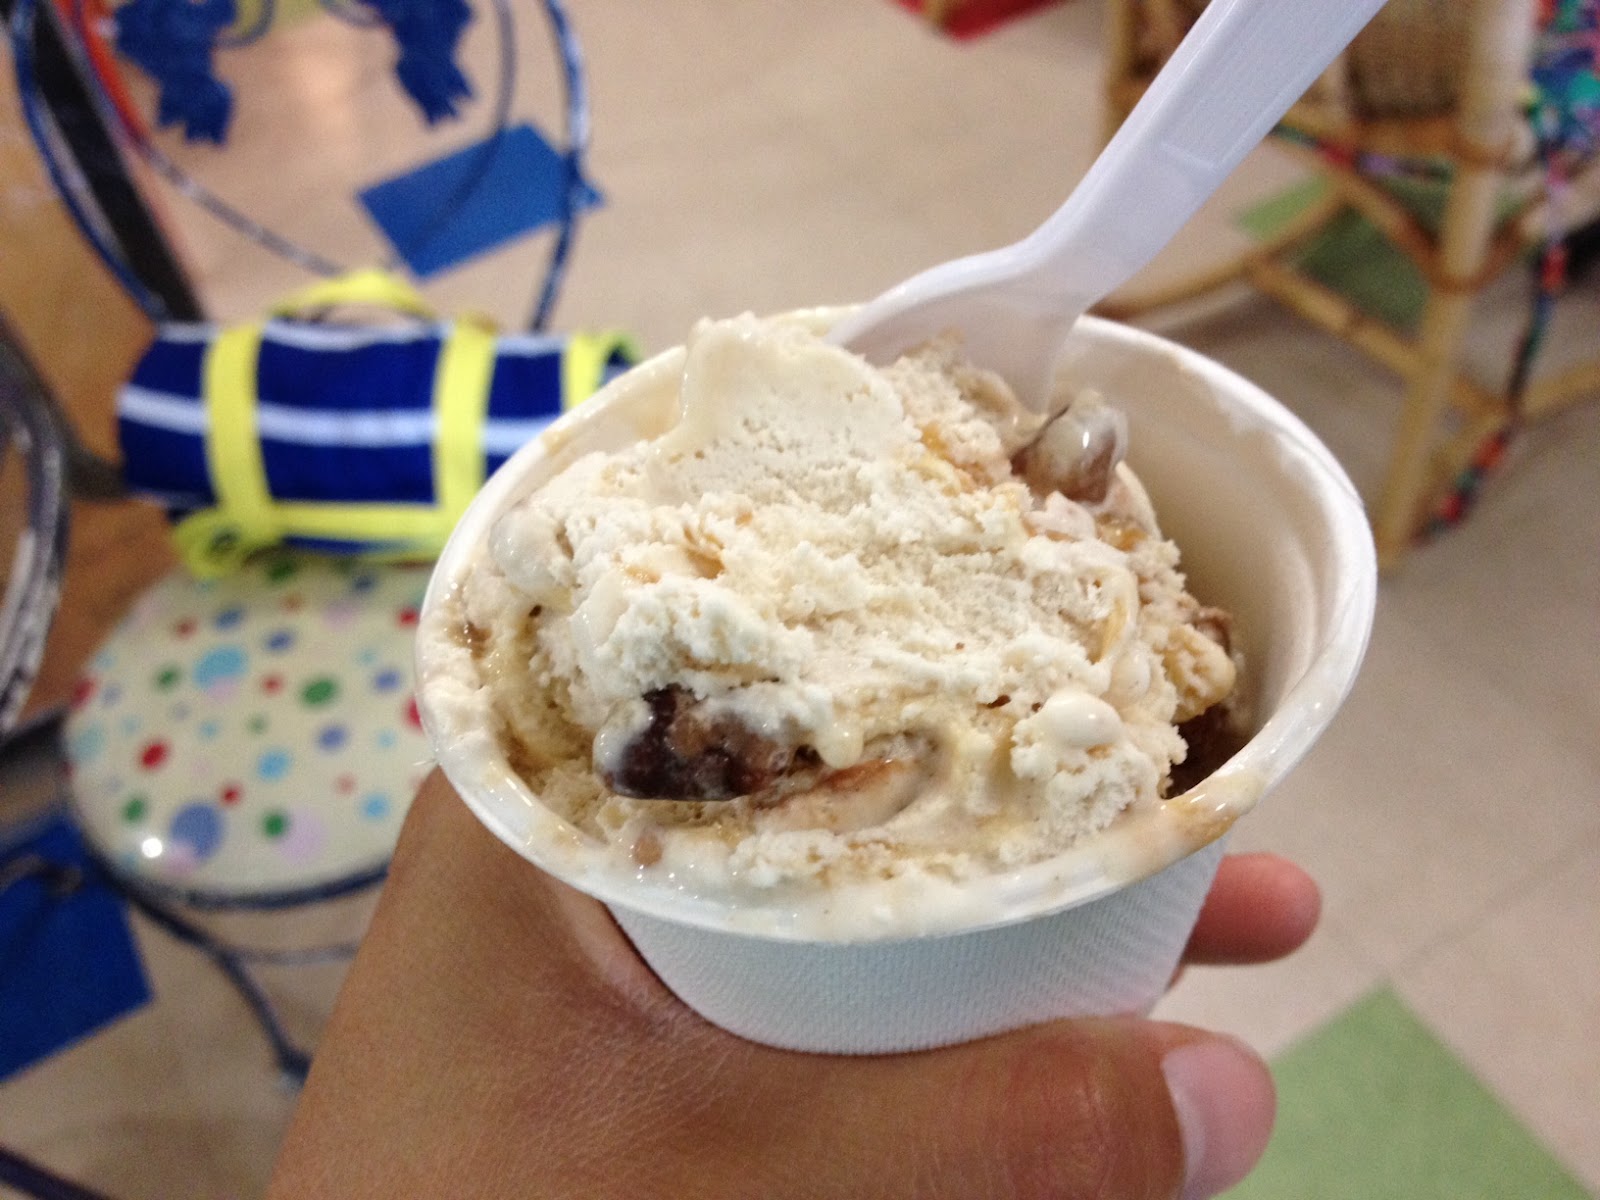
Walked into this shop for some ice-cream, and what a surprise! The owner appears to be some hyper-hippie, and the entire shop was plastered with LPs by the Beatles, Bob Dylan, Elvis, etc. The flavors were pretty unusual too -- guava with cheesecake?! I had a relatively normal praline pecan and it was pretty good. Quite an interesting find in a small seaside town.


Thursday, 14 June 2012

Update to Scones

Last week I posted the recipe to making scones, and here are my latest photos!


Because I was preparing for a party, I made finger-food and bite-sized sizes, by rolling the dough slightly thinner (around 1/2 inch). I used my heart and small star cookie cutters to make the shapes. Bake time turned out to be the same -- around 12 minutes to fully cook the interior.
Prep time was less than 15 minutes to prepare the dough. I took more time beta-testing and making sure I got the bake time right..


The brown blobs are my feeble attempts at adding chocolate chips as an afterthought..


Tuesday, 12 June 2012

Linzer Sandwich Cookies

D and Z came over to make cookies yesterday and we had lots of fun!
These are sandwich cookies and you can make any shape you like using cookie cutters of two sizes.
Here's the recipe (makes around 12 sandwiches):


Ingredients:
16 tablespoons (or 226.8 grams, or 1 cup, or two sticks) of unsalted butter
2/3 cup confectioner's sugar
1 large egg yolk
1 teaspoon vanilla extract
1/4 teaspoon salt


Sandwich Filling:
Jam or Nutella or whatever filling you like!


Directions:
1. Preheat oven to 325 F. Cut baking/wax paper to fit your baking tray.
2. Beat butter and sugar till fluffy
3. Beat in egg yolk and vanilla, and then flour and salt
4. Shape dough into a big lump. Portion out enough to work with and fill a baking tray. Wrap in clingwrap and refrigerate the rest of the dough.
5. Roll out the dough on baking/wax paper to around 1/8" thickness (around 3-4 mm). Use cookie cutter to cut out shapes (we used heart, bear and star shapes!). To make cookie windows (so that your jam or Nutella peeps through), use a smaller cookie cutter to cut a hole in the middle of the bigger cookie. (see Note 1 below)
6. After preparing the shapes, simply lift the paper and place onto the baking tray. (see Note 2 below) Make sure that the dough is flat and not bent.
7. Bake for 10-12 minutes until the cookies turn golden brown.
8. Leave the cookies to cool, and then sandwich jam or Nutella between the bigger cookie and the window.
9. Ready to eat!


Note 1: It might be a good idea to make the windows in slightly thicker dough, since they are narrow and more fragile after baking.
Note 2: We tried using a Silpat sheet to shape our dough on, but the transfer process onto the baking tray was more difficult, since the dough broke its shape easily. Probably due to lack of skill though. 


Photos from our adventure:


Cutting cookie shapes 


Sunday, 3 June 2012

Scones

Thinking of trying this sometime this coming week!


Dry Ingredients:
1 3/4 cups of all-purpose flour
1 tablespoon of sugar 
1 tablespoon of baking powder 
1/2 teaspoon of salt


Wet Ingredients:
1 cup heavy cream
Some melted butter


Directions:
1. Mix dry ingredients in a big bowl.
2. Add heavy cream, stirring until mixture becomes stiff enough to knead by hand into a smooth ball.  
3. Flatten the dough on a lightly floured surface to a thickness of about 2/3" and punch ouscones.
4. Dip scones in 2-3 tablespoons of melted butter before arranging on a baking tray and cooking at 425F for 10-12  minutes or when lightly browned.


How to eat scones:
0. Invite a friend (or friends)
1. Lay out tea table with cute tea set and cups of English tea (Earl Grey and English Breakfast are my all-time favourites!)
2. Cut scone in half horizontally.
3. Spread the inside with dollops of clotted cream and jam. 
4. Enjoy! 


I'm still trying to find clotted cream in the supermarket though.... will post photos soon!

Wednesday, 30 May 2012

Pear crumble pie

Had the inspiration to make pear crumble pie two days ago, and it was a success!
I adapted the recipes from http://allrecipes.com/recipe/pear-crumb-pie/ and http://cookalmostanything.blogspot.com/2011/07/pear-crumble-pie.html


I used Bosc pears, after consulting with a baker friend. These pears are apparently more crunchy than other brands, if you like your pie to have a crunchy filling.


  • Pastry: 
  • 1 frozen pastry shell (from major supermarkets such as Safeway and Whole Foods)

  • Filling:
  • slightly less than 1/2 cup packed brown sugar 
  • 2 tablespoons all-purpose flour
  • 1/2 teaspoon ground cinnamon
  • 1/8 teaspoon salt
  • 1 dash ground nutmeg
  • 6 cups peeled pear chunks (equivalent to approx. 6 pears)
  • 1 tablespoon lemon juice

  • Crumble Topping:
  • 2/3 cup all-purpose flour
  • 1/3 cup packed brown sugar
  • 1/3 cup cold butter 

Instructions:
1. Toss and combine filling ingredients; spoon into the crust, avoiding adding the excess liquid . 
2. Bake at 400 degrees F for 25 minutes. 
3. Meanwhile, make the crumble topping. First combine the flour and brown sugar and then cut in butter until crumbly. (cutting in butter means you chop up the block of butter while coating it with flour/sugar. Good for relieving stress and venting frustration till satisfied) 
4. Sprinkle crumble topping over filling and bake for another 40 minutes. Cover edges with foil during the last 15 minutes to prevent overbrowning if necessary.

Result: A tasty snack with a crunchy, tart filling that is complemented by the crumbly crust that doesn't require too much mastication. 
My only concern was the slightly soggy pastry bottom (pears have a lot of water after all), which falls apart if you try to serve it right after removing from the oven. However, according to the 2nd link I posted, you can get around that by adding almond meal (and I think oatmeal too) to the pastry bottom before adding the filling, to help soak up some of the juices that would leak out during the baking process. The sogginess disappears if you let it sit for 20 min though, if you have patience enough to wait so long.. 
In any case, the pie tastes great whether hot or cold. Enjoy!


p.s. this recipe can be adapted to make apple pie. Just use 8 cups of tart Granny Smith apples. Some recipes ask for more flour, but I believe this just determines how thick the filling ends up.